
Setting Clear Project Goals
Before a single tile is laid, picture how your bathroom needs to function in your real space—whether that’s a cozy apartment, a family home, or a short-term rental. Just like planning a kitchen renovation or living room makeover, a structured bathroom renovation planner helps you avoid costly mistakes and keeps every decision purposeful.
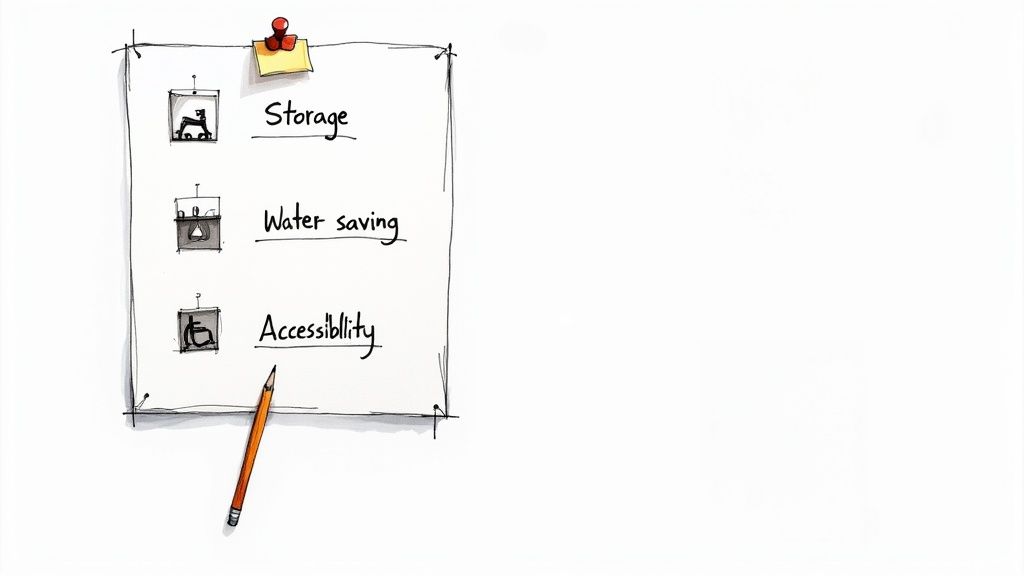
Pinpoint your top three priorities—extra storage for toiletries, water-saving fixtures, or accessible features for guests with mobility needs. Clear goals also curb surprise expenses and detour those tedious change orders.
Defining project priorities can reduce change orders by up to 40% and keep bids focused.
- Must-Haves: Essentials like a double sink for busy mornings or a curbless shower for universal access.
- Nice-to-Haves: Luxuries such as heated floors or mood lighting that boost rental appeal.
- Deal-Breakers: Features to avoid—maybe removing a favorite tub in a kid-friendly home.
This simple framework helps you compare contractor bids head-to-head, stay on budget, and save time on decision-making.
Incorporating Family And Guest Needs
Families often need materials that stand up to rough-and-tumble days. Airbnb hosts and real-estate pros want picture-perfect details that demand minimal upkeep.
- Choose porcelain floor tile rated for heavy foot traffic—durable, stain-resistant, and hotel-quality.
- Pick a moisture-resistant paint that wipes clean after toothpaste splatters.
- Opt for quartz countertops to resist scratches from daily hustle.
- Add open shelving for neatly displayed guest amenities in rentals.
- Install lever handles or curbless showers to welcome seniors or guests with mobility challenges.
By spelling out these details up front, you remove guesswork for your contractor—and sidestep mid-project pivots and extra costs. One Airbnb host avoided an unexpected $800 upgrade by specifying exact tile names and faucet brands before bidding.
Using AI To Validate Goals
AI interior design tools let you play with layouts long before lifting a tile. Upload a snapshot of your current bathroom and watch different plans unfold instantly:
- Swap shelving arrangements until storage feels just right.
- Toggle between water-saving fixtures for side-by-side comparisons of style and cost.
- Preview color palettes that align with your quiz results from Home Design Style Quiz.
These visual mockups slash decision fatigue and confirm you’re hitting every priority before ordering materials. AI tools can generate dozens of ideas in seconds, saving you time—but remember to combine those mockups with your personal taste or a pro’s expertise for code compliance and final finishes.
Why Clear Goals Matter
When you know exactly what you want, time and money stay in check. One homeowner who focused on water-saving fixtures saw a 15% drop in projected utility bills. Hosts prioritizing statement lighting boosted Airbnb rates by 12%, proving that targeted upgrades pay off.
Key Advantages
- Focused Bids: Contractors quote precisely for your scope.
- Budget Control: Avoid up to 40% in change-order spikes.
- ROI Boost: Allocate funds where they deliver the biggest resale or rental payoff.
Globally, the bathroom remodeling market is set to hit USD 412.8 billion in 2025 and grow to USD 593.7 billion by 2035 at a 3.7% CAGR. For deeper market insights, check the Future Market Insights report.
Clarity at the start leads to smoother projects and happier users.
With goals firmly in place, you’re ready to tackle precise measurements and layout planning. Next up: survey your space, sketch zones, and plot dimensions for a rock-solid renovation roadmap.
Ready to see your bathroom goals come alive? Try Interior Redesign AI now—upload a photo, experiment with layouts, colors, and fixtures, and avoid pricey mistakes before buying any materials. It’s free today.
Survey Your Bathroom And Measure Space
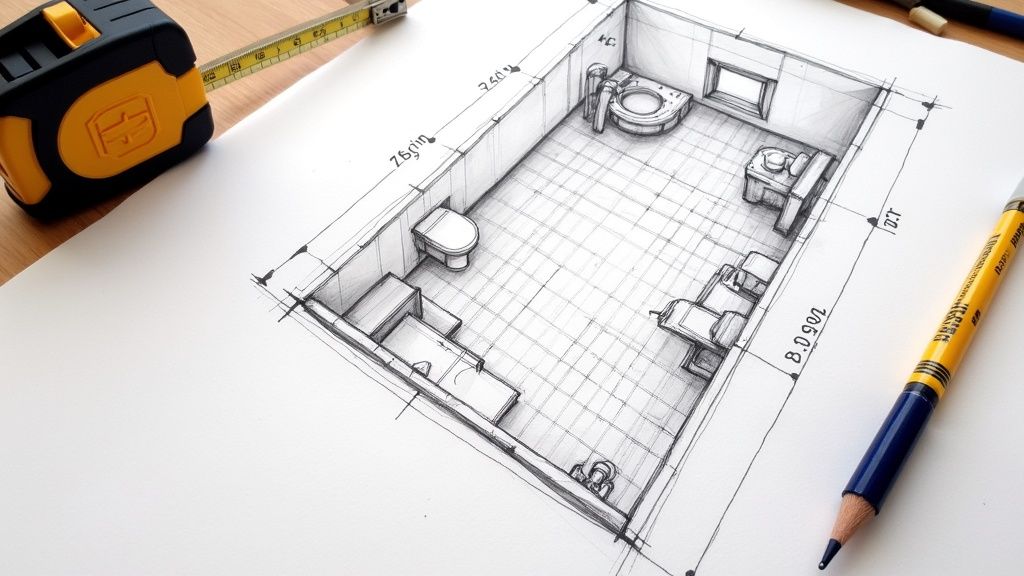
Getting measurements spot-on is the secret to avoiding headaches down the line. Sketching the room—on graph paper or in an app—lets you see walls, doors, and windows at a glance. A laser measure or sturdy tape locks in precision down to 1/8 inch, so you’re never guessing.
Record every dimension: wall lengths, ceiling heights, plumbing rough-ins, even outlet positions.
Even a 0.25-inch error can trigger reorder fees or moving a showerhead after installation.
Preparing Your Sketch
Outline all structural elements. Walls, bulkheads, beams, and joists dictate where fixtures land. Jot down obstructions—vents, columns, built-ins—to keep traffic flowing.
When ready to measure:
- Wall-to-wall lengths on each side
- Door and window widths plus clearance space
- Distance from walls to plumbing stub-outs
- Height from floor to electrical outlets and switches
Recording Key Dimensions
Choosing the right tool makes a difference:
| Tool Type | Accuracy | Pros and Cons |
|---|---|---|
| Laser Measure | ±1⁄16 inch | Fast readings, clear display, higher cost |
| Steel Tape | ±1⁄8 inch | Budget-friendly, simple, manual readout |
Check ceiling heights in several spots. Sloped ceilings or dropped soffits in older homes can sneak up on you if you only measure once.
Double Check Your Measurements
A second pass guarantees you haven’t missed anything:
- Measure from corner A to B, then C to D.
- Reverse the tape from B back to A and D back to C.
- If any reading shifts more than 1/4 inch, take a third run.
This little extra step can save hundreds in change-order fees.
Pro Tip: Use a graph-paper app that syncs with photos so you can jot digital notes right on a room snapshot.
Uploading pictures to an AI tool like Interior Redesign AI helps you test fixture layouts against your exact dimensions. One Airbnb host discovered a 48-inch vanity fit perfectly in 3D, avoiding a $500 custom order for the wrong size.
When all your numbers are set, you’ll have a dimension sheet ready for designers, contractors, and permit applications—no surprises, just smooth bids.
Learn more about digital planning in our guide on the Online Home Design Planner.
Tools And Apps To Speed Up
Smartphone apps can turn your device into a measuring powerhouse:
- MagicPlan uses AR to capture room shapes with a quick scan.
- RoomScan Pro draws walls automatically as you walk the perimeter.
Export PDFs for contractors, drag and drop fixtures, then tweak sizes on the fly. Pair these apps with our Online Home Design Planner or AI interior design tools for rapid layout experiments.
With precise measurements in hand, you’re ready to compare fixtures, refine your layout, and jump into budget planning without second-guessing.
Up next: building a budget and financing plan that matches your goals and space.
Create Budget And Financing Plan
Renovations can feel overwhelming, but breaking your bathroom makeover into spending buckets keeps stress at bay—just like sorting a grocery list. This clarity helps renters, apartment dwellers, and homeowners alike stay on track.
One Airbnb host capped a refresh at $22,000 and still delivered hotel-quality style, driving up nightly rates. That real-world success shows how focus and planning pay off.
Global figures underline the trend: the bathroom remodeling market is pegged at $398.1 billion in 2024 and on track to hit USD 574.1 billion by 2034 at a 3.7% CAGR. Dive deeper in the GM Insights.
Budget Category Breakdown
Separating costs early means you can compare contractor quotes without surprise fees:
- Demolition: Tear-out and disposal, roughly 10% of your budget.
- Plumbing & Electrical: Rough-in work, around 20–25%.
- Fixtures & Hardware: Vanities, faucets, toilets, about 40–50%.
- Labor: Skilled tradespeople, another 20–25%.
- Finishes: Tile, paint, trim, usually 15–20%.
- Contingency: Set aside 10% for the unexpected.
A clear budget roadmap keeps decision stress low and spending in check.
Financing Options And Negotiation
Finding the right funding path can shave interest and anxiety from your project:
- Home Equity Line borrows against your property at competitive rates.
- Personal Loan offers fixed payments and fast approval.
- Credit Card bridges short-term gaps—watch the APR.
- Savings wipes out interest if you pay upfront.
Smart money moves from real renovators:
- One host scored 15% off tiles by ordering when stock was high.
- Booking trades in winter trimmed labor quotes by 10%.
- Bundling plumbing and electrical with one provider clipped fees.
Track and compare bids in a renovation app—see our list of Best Home Renovation Apps. Updating quotes in a live tracker can prevent overspending by up to 25%.
Bathroom Renovation Budget Template
Below is a typical cost breakdown to guide your spending. Adjust these figures for your region and material choices.
| Expense Category | Estimated Cost Range | Percentage of Total Budget |
|---|---|---|
| Demolition | $1,500 – $3,000 | 10% |
| Plumbing and Electrical | $4,000 – $5,500 | 20–25% |
| Fixtures and Hardware | $8,000 – $11,000 | 40–50% |
| Labor | $4,000 – $5,500 | 20–25% |
| Finishes | $3,000 – $4,500 | 15–20% |
| Contingency | Variable | 10% |
Use this table as a starting point. Tweak the ranges for “Basic,” “Mid-Range,” and “Premium” scenarios:
- Basic: Vinyl floors and stock fixtures
- Mid-Range: Porcelain tile and quality faucets
- Premium: Marble surfaces, top-tier hardware, digital shower controls
Snap a photo of your room and upload it to Interior Redesign AI to test layouts instantly—spot cost-saving swaps long before placing orders.
Always order 10–15% extra tile to dodge color-match headaches, and ask suppliers to lock in prices for 30 days.
Design Layout And Select Fixtures
Your renovation goals and exact measurements serve as the roadmap for arranging fixtures and walkways. Rather than guessing, you’ll shape the bathroom’s flow to fit your lifestyle—even in small apartments or tight rental spaces.
With plumbing rough-ins and traffic patterns mapped out, pick a layout that balances style, function, and cost.
Comparison Of Popular Bathroom Layouts
| Layout Type | Pros | Cons | Best For |
|---|---|---|---|
| Single-wall | Keeps plumbing on one wall, cutting costs | Limits where fixtures and storage can go | Compact baths or half-baths |
| Galley | Dual runs optimize workflow | Feels tight if width exceeds 5 feet | Narrow, elongated spaces |
| L-shaped | Splits wet and dry zones naturally | May need extra plumbing if walls don’t align | Medium to large footprints |
Use this to choose the setup that best fits your square footage and budget.
- Vanities: Check depth and height for comfort. Floating drawers free up floor area.
- Showers: A curbless entry offers safe access; a small curb keeps water contained.
- Toilets: Choose 1.28 GPF models—they cut water use without losing flush power.
Selecting Fixtures For Efficiency
Water-wise fittings deliver savings over time and appeal to eco-minded buyers. 73% of homeowners report lower bills after upgrading to high-efficiency fixtures.
Materials built to last—solid-surface sinks shrug off chips, while porcelain endures heavy use. Adding universal design touches (lever handles, grab bars, adjustable showerheads) boosts safety and broadens resale potential.
Refine Traffic Flow
Separating wet and dry zones makes cleaning easier and reduces slip risks:
- Dry Zone: Sink, storage, and towel hooks stay out of splash range.
- Wet Zone: Shower or tub sits inside a tiled alcove for efficient drainage.
- Toilet Zone: Nestles in a corner or behind a half-wall for privacy.
These tweaks cut maintenance time and elevate daily comfort.
Introduce Financing Infographic
When deciding how to fund your renovation, you’ll usually choose between savings, personal loans, and home equity.
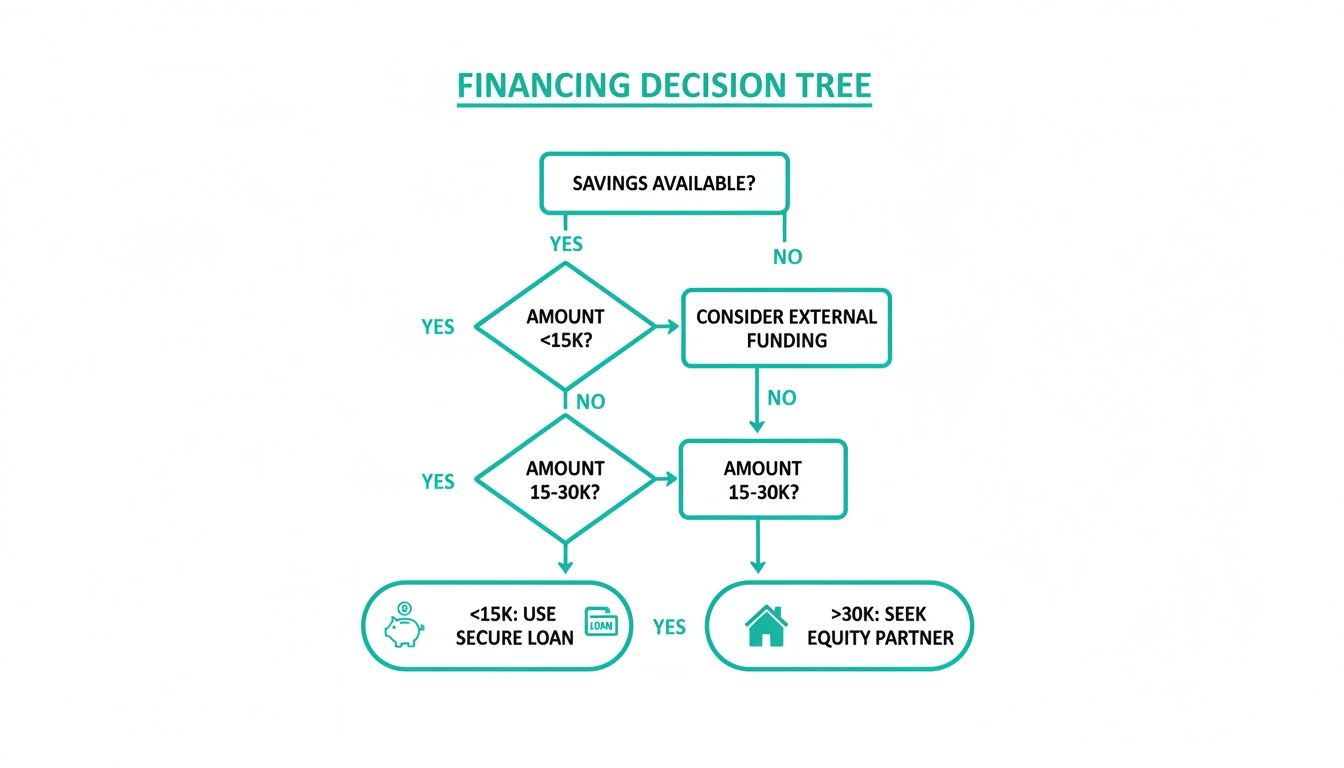
Budgets under $15K rely on cash reserves, mid-range projects use personal loans, and larger overhauls tap home equity.
Visualize Designs With AI
If rough sketches leave questions unanswered, try Interior Redesign AI. Upload photos or simple floor plans, then swap layouts, fixtures, and finishes in seconds:
- Spot and fix misaligned drains before ordering, saving $1,500.
- Try tile patterns on the fly instead of waiting for samples.
- Share detailed renders with your contractor to confirm dimensions.
AI interior design tools can speed up room makeovers, but pair them with on-site measurements and a pro’s input for final approvals. By the end of this step, you’ll have a polished layout drawing and a fixture shortlist that match your budget, space, and style goals.
Next up: locking in finishes and handing plans off to your contractor.
Manage Permits And Hire Contractors
Getting the right permits and hiring a reliable contractor keeps your project legal and on schedule. Skip needed permits and you could face fines, rework delays, or safety hazards.
Local rules vary, but major work—like rerouting pipes or upgrading wiring—almost always demands approval. Swapping a faucet or changing a light fixture often breezes through without one.
Before you break ground, visit your city’s building department website or call them to nail down requirements.
- Plumbing Permits: New rough-ins, pipe relocations
- Electrical Permits: Added circuits, load changes
- Structural Permits: Wall removals, large openings
- Waterproofing Inspections: Showers, wet areas
Checking Local Code
A quick call to code officials can save you from costly hold-ups. One homeowner skipped a plumbing permit and ended up with $2,000 in fines plus extra weeks for reinspection.
Getting permits before work starts avoids fines and project delays.
- Draft a clear scope of work and deliverables in writing.
- Collect detailed, itemized bids from at least three contractors.
- Verify each pro’s license, insurance, and references.
- Establish a transparent change-order process in your contract.
Vetting And Choosing Contractors
Review portfolios of bathroom projects. Look for pros skilled in waterproofing, tile setting, and precise fixture installation.
- Check License and Insurance: ensure credentials meet local codes.
- Review Past Projects: request photos or site visits.
- Talk To References: ask about communication and reliability.
- Confirm Warranties: clarify coverage for labor and materials.
Comparing bids side by side helps spot hidden fees. Lock in milestone-based payments tied to inspections.
| Permit Task | Typical Timeframe | Estimated Fee |
|---|---|---|
| Plumbing Permit | 1–2 weeks | $150–$300 |
| Electrical Permit | 1 week | $100–$250 |
| Structural Permit | 3–4 weeks | $200–$500 |
| Waterproofing | 2 weeks | $100–$200 |
Check our guide on planning home renovations:
Learn more about planning home renovations
Communication And Change Orders
Clear change-order terms keep your project moving. Spell out extra work rates, approval steps, and notification windows in writing. Unapproved tweaks can halt inspections and stall your finish date.
- Record every request via email or contract addendum.
- Approve costs before work begins to protect your budget.
- Update permit applications if changes affect structural or plumbing work.
Use AI Interior Designer screenshots to share 3D renderings with bidders and code officials—catch layout conflicts before permit drawings go in. This cuts back-and-forth and keeps your timeline tight.
Next up: on-site management and the final punch list. Stay proactive, and you’ll head off issues before they arise.
Oversee Renovation And Final Punchlist
As demo dust settles, your role becomes full project manager. You’ll track everything from teardown to final grout lines. Vigilance and clear communication are key.
Your renovation planner is a lifeline. Capturing site photos and notes keeps small snags from turning into major headaches and lets you compare reality with mockups at every turn.
- Milestone Checklist: demo, rough-ins, waterproofing, tiling, fixtures.
- Photo Log: capture hidden issues like water damage or floor slope.
- AI Interior Designer Screenshots: overlay mockups with live progress.
Using AI To Spot Variances
Overlay your mockup onto a real image and subtle shifts pop out. A grout shade that looked creamy in render might appear dull in natural light. Regular screenshots help catch misaligned accessories or tile patterns before they become costly.
Progress Tracking And Coordination
Visiting the site several times a week keeps everyone honest. Confirm plumbing rough-ins line up with your layout and electrical boxes aren’t off by an inch. One homeowner spotted a shifted drain early on—avoiding a $600 reroute fee. Clear communication, whether a quick group chat with photos or on-site huddles, makes all the difference.
| Task Phase | Expected Duration | Checkpoint Deliverable |
|---|---|---|
| Demolition | 1–2 days | Cleared surfaces, waste removal |
| Rough-Ins | 3–4 days | Pipes and wiring positioned |
| Waterproofing | 2 days | Membrane applied, dry weather |
| Tiling | 4–6 days | Tiles set, grout ready |
| Fixtures | 2–3 days | Vanity, shower, toilet in place |
Catching problems early can save $800 or more in rework.
Don’t let late deliveries hold up progress. Flag delays on tile or fixtures at least two weeks ahead. A quick call to suppliers often clears confusion before it stalls your project. When surprises pop up, update your planner, add fresh photos, and share edits through your AI tool so everyone stays aligned.
Final Punchlist Template
As you near the finish line, pull together a punchlist that leaves nothing to chance. Walk through the space with a checklist, inspecting grout uniformity, tile alignment, trim fit, and plumbing connections.
- Inspect grout lines for gaps or color mismatch.
- Verify tile slopes toward drains to avoid puddles.
- Check caulk and sealant joins around fixtures.
- Test faucets, drains, and electrical outlets.
- Confirm trim pieces are flush and paint is even.
One homeowner found a 1/8-inch lip between tiles. Tackling that before grout cured saved $800 in retiling. A tight punchlist is your insurance against small—yet expensive—oversights.
A thorough final walkthrough ensures your renovation meets every standard.
With every punch item cleared, sign off with your contractor and request all warranty documents. File your planner and photo log—they’ll boost resale value and guide future maintenance.
Ready to see your mockups beside real-world progress? Try Interior Redesign AI to upload project photos, compare designs, and fine-tune details before you wrap up. It’s the last step your bathroom renovation planner needs to stay on track and under budget.
Frequently Asked Questions
Budget Allocation
What’s the right split between fixtures and labor? A good rule of thumb for your bathroom renovation planner is:
- 40–50% on tiles, faucets, vanities, and other finishes
- 30–35% for plumbing, tiling, and skilled trades
- 10–15% reserved for change orders or hidden issues
Keep this ratio in mind when gathering bids—each estimate should roughly echo this breakdown.
Permit Insights
Swapping out a faucet or light usually doesn’t need a permit, but once you reroute plumbing or add electrical circuits, local authorities will likely require paperwork.
| Work Type | Permit Needed |
|---|---|
| Faucet or hardware | No |
| Plumbing reroute | Yes |
| Electrical add-ons | Yes |
- Always get written approval before work begins.
- Build permit lead time into your schedule.
- Plan on $100–$300 per trade for application fees.
A quick permit check saves you from penalties and delays down the road.
AI Planning Benefits
Experimenting with layouts by hand can eat up time—and cost money if you pick the wrong pieces. An AI interior design tool lets you upload a photo, then try out color schemes, fixture placements, and multiple design directions in seconds.
- Swipe through 50+ curated style themes.
- Compare materials side by side—finish, texture, and tone.
- Preview in 3D to verify traffic flow and sightlines.
One homeowner discovered their vanity was too wide for a 6-foot wall without ever ordering it—saving $500 in custom millwork.
When To Hire A Pro
If your project goes beyond a simple swap—think custom cabinetry, major layout shifts, or plumbing reroutes—a seasoned designer or architect can steer you clear of code violations and headaches.
- ADA or universal design compliance (lever handles, curbless showers).
- Complex lighting and electrical schemes.
- Detailed millwork or bespoke built-ins.
- Significant footprint changes.
Bringing in an expert early merges professional insight with AI mockups, cutting change orders and stress.
Ready to eliminate costly guesswork? Try Interior Redesign AI to instantly reimagine your room from a photo or sketch.