Tired of tripping over a mountain of shoes, bags, and jackets by the door? This project is for you. A closet-to-mudroom conversion is a surprisingly simple upgrade that can bring much-needed order to your daily life. By removing the doors, adding a bench, and installing smart storage, you create an organized "landing zone" that stops clutter in its tracks.
Why Converting a Closet to a Mudroom is a Smart Home Upgrade
That underused closet near your entryway holds incredible potential. It's perfectly positioned to become a hardworking hub that streamlines your family's comings and goings. This isn't just about adding shelves; it's about creating a system that keeps your home tidy from the moment you walk in.
This is a favorite project of mine, and it’s a hit with homeowners, real estate agents, and Airbnb hosts for several practical reasons:
- It Solves Real-Life Clutter: It provides a dedicated spot for everything from muddy boots to heavy backpacks, containing messes right at the door. For busy families, this is a game-changer. For Airbnb guests, it's a thoughtful touch that makes them feel welcome and organized.
- It Maximizes Small Spaces: You can create a highly functional zone without a major renovation or adding on to your house. This is a huge win for apartments, condos, and smaller homes where every square foot is precious.
- It Adds Real Value: A well-designed mudroom is a feature buyers love. This simple closet conversion is one of those strategic upgrades to add value to your home that pays you back, both in daily convenience and in market appeal when it's time to sell.
- It Boosts Listing Appeal: For Airbnb hosts, a mini-mudroom offers guests a clear, convenient place to drop their things. It makes their stay feel more organized and boosts the overall guest experience from the second they arrive.
A High-Impact Project on a Small Budget
One of the best parts of this conversion is how affordable it is. While a full-scale mudroom addition can run into the thousands, a closet makeover can be done on a surprisingly small budget. This makes it a fantastic project for anyone wanting a meaningful upgrade without a huge financial investment.
This can be a weekend project that costs just a few hundred dollars. In one great example, a DIYer turned a forgotten closet into a beautiful, functional mudroom for only $302. That covered everything—wood, hooks, baskets, and paint. You can see the full budget breakdown and project details here for inspiration.
Key Takeaway: You don't need a huge budget or a separate room to get the mudroom you want. An existing closet provides the perfect framework for a smart, stylish, and cost-effective home improvement.
Visualize Your Idea Before You Start
Feeling nervous about removing those closet doors for good? This is where technology can remove the guesswork and reduce decision stress.
Using an AI tool like Interior Redesign AI, you can snap a photo of your closet and see exactly what it would look like as a mudroom before you touch a thing. You can visualize different layouts, compare a full-width bench to individual cubbies, and test various paint colors or wood finishes. This helps you fine-tune your vision and start the project feeling confident in your plan, saving you time and money.
Step 1: Planning Your Layout and Picking the Right Closet
Before you even think about swinging a hammer, solid planning is key. This is your blueprint for success, where you’ll decide which closet is the best candidate and how the new space will function for your family's daily routine.
The best location is almost always where the chaos already lives. Is there a closet near the garage, front door, or back patio where everyone instinctively drops their stuff? Converting a closet in that high-traffic path is the secret to creating a drop-zone that people will actually use.
Assess Your Space and Daily Needs
First, grab a tape measure. Get the exact width, depth, and height of your chosen closet. While you're there, look for electrical outlets nearby. Having power is a huge bonus if you're thinking about adding a charging station for devices or a boot dryer for wet winter months.
Next, get honest about what your family truly needs. This isn't about building a Pinterest-perfect mudroom; it's about solving your specific clutter problems.
- For Families with Young Kids: A low, sturdy bench is a must for them to sit and wrestle with their shoes. Add hooks and cubbies at their height to empower them to hang up their own things.
- For Pet Owners: You'll want durable, waterproof flooring and a dedicated spot for leashes and towels for muddy paws. Some clever designs even include a pull-out drawer for food bowls.
- For Airbnb Hosts: Think guest convenience. Simple hooks for coats, a small shelf for keys, and maybe a welcoming sign can make a huge difference in their experience and your reviews.
- For Apartment Dwellers: Think vertically. High shelves are perfect for stashing off-season gear, freeing up the lower, easy-to-reach areas for your everyday essentials.
This process is all about turning a daily frustration—the cluttered entryway—into a functional and valuable asset for your home.
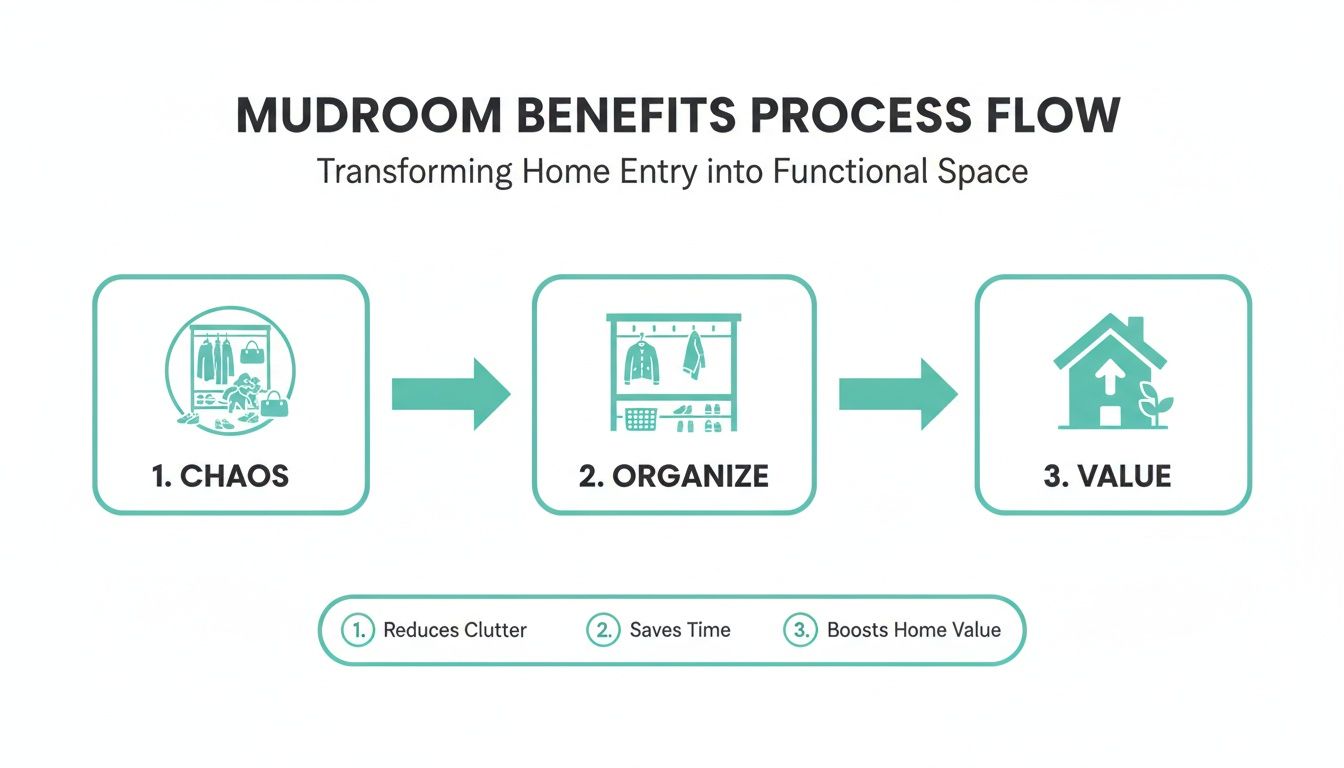
As you can see, a well-planned conversion streamlines your daily routine while boosting your home's functionality and appeal.
See It Before You Build It
Sketching ideas is a great start, but seeing how they look in your actual space is a game-changer. This is how you catch design mistakes before they cost you time and money. Are you debating between a long bench or separate storage ottomans? Worried shiplap might make the space feel too small?
This is the perfect moment to use AI. With an online home design planner like Interior Redesign AI, you can upload a photo of your closet and see your ideas come to life instantly. The tool generates realistic mockups, letting you test different layouts, materials, and colors in just a few clicks. Seeing a photorealistic render provides the confidence you need to move forward.
Expert Tip: Don't just plan for storage—plan for movement. Make sure your design doesn't create a bottleneck in a busy hallway. A bench that's too deep can crowd the space, and hooks placed too close to the main door can stop it from opening fully. These are the practical details that make a design truly work.
Step 2: Demolition and Prep Work
With your plan in hand, it’s time to get to the fun part: the transformation. This is where your cluttered closet begins its new life as an open, functional mudroom. It might get a little messy, but every bit of dust brings you closer to the organized entryway you've been dreaming of.
The first step is creating a blank slate. Carefully remove the closet doors, hinges, and all surrounding trim. Then, pull out any old wire shelving, hanging rods, and baseboards from inside. Your goal is to strip the space down to its bare bones.
This initial demolition is often the most satisfying part of the project. As soon as the closet is opened up, the entire area feels bigger and brighter.
Creating a Flawless Canvas
Once the old hardware is out, you'll likely be looking at holes and dings in the drywall. Don't skip this next step—meticulous prep is what makes a project look professional.
Grab a quality spackle or drywall compound and fill every nail hole, screw hole, and dent. Use a putty knife for a smooth application, let it dry completely, and then sand everything until it's perfectly flush with the wall. A smooth surface is essential for a clean paint job or any wall treatment.
If you're juggling multiple projects, some of the best home renovation apps can help keep your to-do lists organized.
Pro Tip: Before you open a can of paint, apply a coat of high-quality primer. Primer seals the patched drywall and creates a uniform base so your paint color looks rich and adheres properly. This is crucial if you're going from a dark closet to a lighter, brighter color.
Adding Character with Wall Treatments
Now that your walls are smooth and primed, you can add some personality. A simple coat of paint is always a solid choice, but a wall treatment can elevate the space from a converted closet to a beautiful, intentional mudroom nook.
Here are a few popular and durable options:
- Shiplap or Tongue-and-Groove: These horizontal planks bring a cozy, modern farmhouse vibe and are incredibly durable against knocks from backpacks.
- Board and Batten: This timeless look uses vertical wood strips (battens) over your drywall, adding a touch of custom architectural detail.
- Beadboard: Typically installed on the lower half of the wall, beadboard offers a clean, cottage-style aesthetic and provides fantastic protection against scuffs and scrapes.
These treatments aren't just for looks; they add a layer of durability perfect for a high-traffic mudroom. Before you buy materials, use Interior Redesign AI to see how each option looks in your space. Visualizing shiplap versus board and batten can make the final decision much easier.
Choosing a Floor That Can Handle Real Life
Let's be honest: mudroom flooring takes a beating. It has to stand up to wet boots, muddy sneakers, and constant traffic. The original closet flooring—especially carpet—is rarely up for the job.
Your best bet is something waterproof, scratch-resistant, and easy to clean.
- Luxury Vinyl Tile (LVT) or Planks (LVP): This is a top choice for good reason. It’s affordable, 100% waterproof, and comes in a huge range of realistic wood and stone looks. The click-lock installation also makes it very DIY-friendly.
- Ceramic or Porcelain Tile: For pure durability, tile is the undisputed champion. It’s completely waterproof and nearly impossible to scratch. Installation is more involved, but the result is a floor that will last for decades.
- Durable Floor Paint: For a super budget-friendly option on a concrete subfloor, a high-quality porch and floor paint can be a game-changer. It seals the surface and gives you a clean, seamless look for a fraction of the cost.
With the walls and floor done, your old closet is officially prepped and ready for the final step: building in the smart storage that will make it a truly functional mudroom.
Step 3: Building in Smart Storage
Now for the most rewarding part. With the prep work done, it's time to build the heart of your new mudroom. The bench, cubbies, and hooks are what will turn this open nook into a hardworking, organized drop zone where function meets style.
The centerpiece of almost any mudroom is the bench. It’s more than just a place to sit; it’s the anchor for the entire space, providing a spot to tie shoes, creating storage underneath, and serving as a base for vertical storage.
Crafting the Perfect Bench
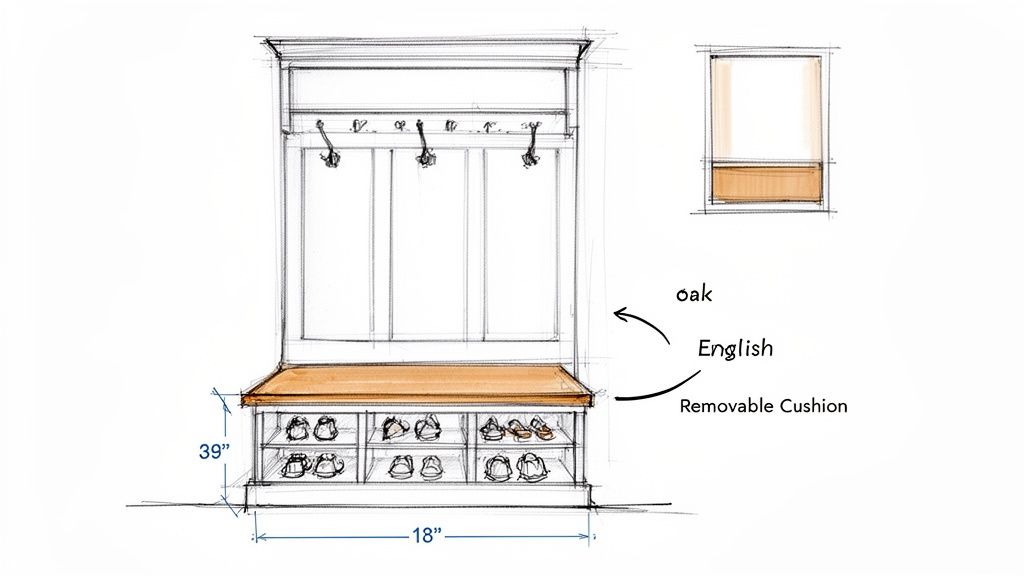
You don't need to be a master carpenter to build a functional bench. A straightforward approach is to construct a simple box frame using plywood or MDF and add vertical dividers for support. This method automatically creates perfect cubbies for shoes or baskets underneath.
A good rule of thumb for bench depth is 16 to 20 inches—deep enough to sit on comfortably without crowding your hallway. Aim for a height of about 18 inches, which is standard seating height.
Real-World Tip: If you have young kids, consider making the bench a little lower, around 16 inches high. This small adjustment makes a huge difference, empowering them to manage their own shoes and get involved in the daily routine.
Designing Vertical Storage That Works
Once your bench is in place, think vertically to maximize every inch of your former closet. The most effective combination is a trio of hooks, cubbies, and an upper shelf.
Start by installing a sturdy backer board (like a 1x6 piece of lumber) directly above the bench. This gives your hooks a solid anchor point so they won't pull out of the drywall when loaded with heavy winter coats.
- Hooks for Everything: Space hooks about 6 to 8 inches apart to give bulky coats and backpacks room. For families, I recommend a double row: one at adult height (around 60 inches from the floor) and a lower row for kids (around 40 inches).
- Cubbies for Organization: Above the hooks, you can build or install individual cubbies. These are perfect for things that don't hang well, like hats, gloves, or a designated spot for each family member’s small items.
- High Shelves for Long-Term Storage: The very top of the closet is prime real estate for seasonal items. A simple, deep shelf running the full width is perfect for baskets holding winter scarves, sun hats, or extra shoes.
This layered approach ensures there is a designated spot for everything—the ultimate goal when you convert a closet to a mudroom.
Visualizing Your Materials Before You Buy
Choosing materials can feel overwhelming. Will a dark oak bench make the space feel too heavy? Do you prefer modern matte black hooks or classic brushed nickel? This is where a visual preview can save you from a costly mistake.
Before committing, use a tool like Interior Redesign AI to experiment. Upload a photo of your prepped closet and generate 4K renders of your ideas. You can instantly see how an oak bench looks against a painted shiplap wall or compare different hardware finishes. It reduces decision stress and ensures the final look is exactly what you envisioned.
If you find the nook is just too small for a bench and cubbies, you might consider another clever use for the space. We have a great guide on how to convert a closet into a bookcase, which uses similar vertical storage principles.
Step 4: Adding Finishing Touches
You’ve done the heavy lifting, the structural work is complete, and your built-ins look fantastic. Now it’s time to bring it all to life. This is where you infuse your new space with style and personality, transforming it from a functional nook into a beautiful part of your home. The right paint, lighting, and decor are the details that complete the project.
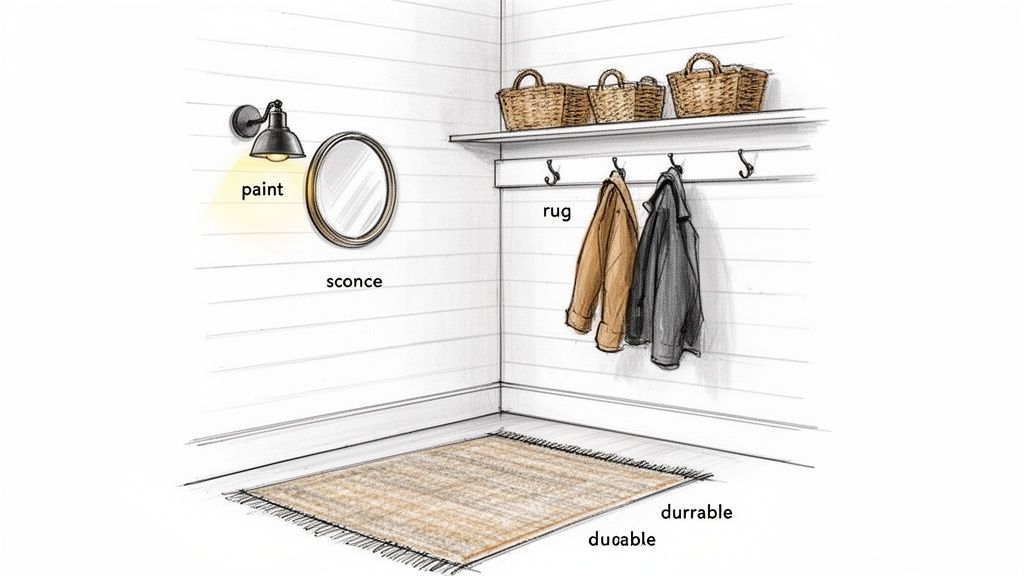
This final stage is all about blending durability with design. You want elements that can handle daily use while reflecting your home's aesthetic, making the new space feel like it was always there.
Choosing the Right Paint
Never underestimate the power of paint. In a compact area, the right color can make a narrow closet feel surprisingly spacious, while the right finish will ensure it stands up to the daily grind.
For a mudroom, durability is key. I always recommend a satin or semi-gloss finish because they're easy to wipe clean from mud splatters and scuffs. Choosing one of the best paints for high-traffic areas is a smart move that will pay off for years.
As for color, you have two great options:
- Light and Bright: Soft whites, airy grays, or pale blues are fantastic for making a small space feel more open. They bounce light around, which is a game-changer if your nook has no natural light.
- Bold and Moody: Don't be afraid of a deep, saturated color! A rich navy or moody green can create a cozy, den-like vibe that turns the mudroom into a stylish jewel box.
If you're stuck, our guide on how to choose paint colors for rooms can help you decide.
Illuminating Your Space
Good lighting is essential in a mudroom. You need to see what you're doing, whether you're finding a lost glove or checking your reflection before heading out. Since most closets are dark, adding a light source is a must.
- The Easy DIY Route: Battery-powered, motion-activated LED puck lights are a brilliant, no-wiring fix. Just stick them under a shelf for an instant warm glow.
- A More Polished Look: For a permanent, high-end feel, consider a hardwired wall sconce or a sleek flush-mount light. A single sconce above the hooks provides plenty of light while also serving as a beautiful design element.
Designer's Tip: Think about atmosphere. A warm-toned bulb (around 2700K) casts a cozy, welcoming light that’s perfect for an entryway. It makes coming home feel that much better.
Adding Personality with Decor and Hardware
Now for the final details—the jewelry of your new mudroom. These touches inject your personality and fine-tune the space's functionality.
- Hardware and Hooks: This is an easy upgrade with a big impact. Swap generic hooks for something that reflects your home's style. Matte black hardware gives a clean, modern vibe, while brushed brass adds classic warmth. Just make sure they’re sturdy enough for heavy coats.
- Baskets and Bins: Woven baskets are perfect for hiding clutter like hats, gloves, and dog leashes on shelves or in cubbies. They also add great texture. Measure your cubbies to find baskets that fit snugly for a seamless, built-in look.
- The Final Flourishes: A few thoughtful extras will pull the entire look together: a small mirror to bounce light and for last-minute checks, a durable rug to protect floors and add color, and a simple bench cushion in an outdoor fabric for comfort and a pop of pattern.
Not sure how these pieces will look together? Use Interior Redesign AI to find out. Snap a photo of your almost-finished space and virtually test different rug patterns, mirror shapes, and basket styles. It lets you see exactly what you love before you spend a dime.
Your Top Questions Answered
Turning a closet into a mudroom is a fantastic project, but it's smart to have questions. Here are the answers to the most common ones I hear from homeowners.
What’s the Real Cost to Convert a Closet to a Mudroom?
The budget can vary widely. I've seen simple DIY projects come in under $300—this usually includes removing the door, a fresh coat of paint, and a basic bench with wall hooks. It’s effective and incredibly budget-friendly.
On the other hand, if you're planning for custom built-ins, hiring an electrician, and laying new tile, you could be looking at $1,000 or more. The key is to spend money where it counts. You can save a ton by building a simple bench yourself, but don't skimp on durable, waterproof flooring—it will pay you back for years.
A Practical Mid-Range DIY Budget Might Look Like This:
- Lumber for Bench & Shelving: $150 - $250
- Quality Paint & Primer: $75
- Luxury Vinyl Plank Flooring: $100 - $200
- Hooks, Pulls & Hardware: $50
- Battery-Powered LED Lighting: $30
- Total Estimated Cost: Around $405 - $605
Will I Need a Building Permit?
For most of these projects, the answer is no. If you're simply changing the function of the space without moving walls or altering the home's structure, you're usually in the clear. This is one of the biggest appeals of a closet conversion—it's a high-impact upgrade with minimal red tape.
However, the moment you decide to add new electrical wiring (like a hardwired light or outlet), the game changes. This work almost always requires a permit and a licensed electrician for safety and code compliance. When in doubt, a quick call to your local building authority is your best first step.
What's the Best Flooring for a Mudroom?
Your mudroom floor will face mud, slush, and constant traffic. The old closet carpet has to go. You need something tough and easy to clean.
These are the top contenders:
- Luxury Vinyl Plank (LVP): My go-to recommendation. It's 100% waterproof, tough against scratches, and simple for a DIYer to install. The realistic wood and stone looks available today are incredible.
- Ceramic or Porcelain Tile: The champion of durability. It’s completely waterproof and nearly impossible to scratch. Installation is more involved, but the result is a floor that will last a lifetime.
- Painted Concrete: A great budget option! If your closet is on a concrete slab, a few coats of high-quality porch and floor paint can create a tough, industrial-chic surface for very little money.
How Do I Keep a Small Mudroom From Feeling Cramped?
Smart design is key for a tiny footprint. Every choice should create a sense of openness.
First, use a light and bright paint color. Soft whites or light grays reflect light and make the space feel less like a cave. A well-placed mirror is another pro trick—it bounces light and creates an illusion of depth.
Next, get furniture off the floor. A "floating" bench that mounts directly to the wall keeps the floor visible, making the area feel larger. Finally, use vertical space to your advantage. Board and batten paneling or a tall shelf can draw the eye upward, focusing on the room's height rather than its limited width.
Got more questions? We cover more ground on our detailed Interior Redesigne AI FAQ page.
Ready to stop guessing and start visualizing? Snap a photo of your closet, and let Interior Redesign AI instantly generate stunning, realistic mudroom designs for you. See your ideas in 4K, play with different styles, and finalize your plan before you start your project. Try it now!