
That cluttered front hall closet—you know the one, overflowing with mismatched shoes and forgotten coats—is prime real estate just waiting for a new purpose. By rethinking that space, you can turn that closet into a mudroom, creating a stylish and incredibly functional "drop zone" that brings order to your daily routine. It's a small change that completely transforms how you enter and exit your home.
Why a Closet Mudroom Is a Game Changer for Your Home
Let's be honest: entryways are magnets for chaos. They become the default dumping ground for backpacks, mail, keys, and everything else we carry inside. A closet-to-mudroom conversion is one of the smartest, highest-impact DIY projects you can tackle because it carves out a dedicated, organized space from an area you probably weren't using well anyway.
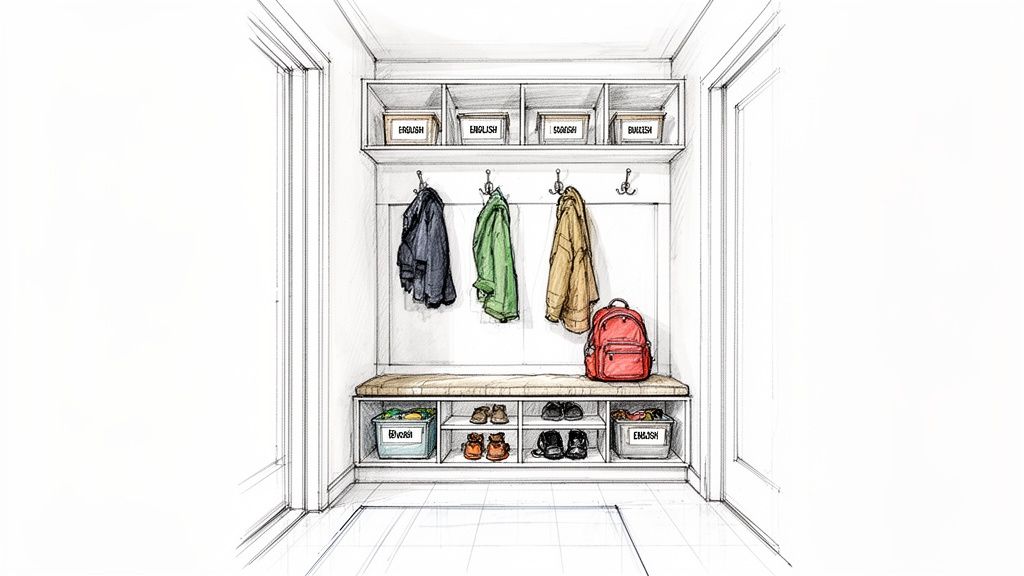
This project isn’t just about being tidy; it’s about creating a system that makes life simpler. For families, it means an end to those frantic morning searches for a specific jacket or shoe. If you're an Airbnb host, it's a thoughtful amenity that guests genuinely appreciate, boosting your listing's appeal and showing you've considered their comfort from the moment they arrive.
More Than Just Storage—It's Smart Design
The demand for functional entry spaces has surged, with global search interest for 'mudroom ideas' skyrocketing by roughly 40–60% in recent years. This shows how much homeowners now prioritize smart upgrades that add real value without the massive cost of a full-scale addition.
A well-designed closet mudroom delivers on several fronts:
- It Maximizes Space: You're making every square foot of a small closet work harder. This is a perfect solution for apartments, condos, and smaller homes where a traditional mudroom just isn't an option. For more small-space ideas, check out our guide on interior design for condominiums.
- It Boosts Home Value: As any real estate agent will tell you, a beautifully organized entryway is a memorable feature that helps a property stand out. It signals to potential buyers that the home is thoughtfully designed for modern living.
- It Reduces Decision Stress: Planning is key, but it doesn't have to be overwhelming. Before you lift a hammer, you can use an AI tool like Interior Flux Studio AI to visualize the final result. Just upload a photo of your closet to instantly see how different layouts, colors, and features like benches or cubbies will look in your actual space. This takes the guesswork out of the project, saving you time and money.
Step 1: Laying the Groundwork for Your Closet Conversion
Before you even think about swinging a hammer, a little prep work is in order. Thoughtful planning is what separates a truly functional mudroom from just another cluttered closet. It's the key to making sure your new space actually solves your daily chaos, stays on budget, and looks amazing.
The first decision is often the most obvious, but it's critical: choosing the right closet. Ideally, you'll want to pick a closet right by the door you use most, whether it's the front door, the one from the garage, or a side entry. A mudroom is all about convenience, so it has to be located at the epicenter of the mess.
Define Your Purpose: What Problem Are You Solving?
Once you've scouted the perfect location, get crystal clear on how your household will actually use this space. A mudroom for a family with two hockey players and a muddy dog will look completely different from one designed for a single person who just needs a tidy spot for their keys and a trench coat.
Grab a piece of paper and think through your must-haves:
- Who is this for? Consider the height of kids, the needs of pets, and even how guests might use the space. This dictates everything from how high you hang your hooks to how durable your bench material needs to be.
- What needs to be stored here? Go beyond coats and shoes. Are we talking about bulky backpacks, dog leashes, sports gear, umbrellas, or reusable shopping bags? Make a detailed list.
- What's the biggest problem you're trying to solve? Is it the permanent mountain of sneakers piled by the door? Or maybe it’s the lack of a place to sit down and wrestle on winter boots?
Answering these questions first helps you design a space that solves real problems. It's also a great time for cleaning out your closet to get a true sense of the blank canvas you're working with.
Measure Twice, Build Once
This old saying is a cliché for a reason—it's absolutely true. Accurate measurements are non-negotiable. Don't just get the basic width, depth, and height. You need to account for things like the thickness of your baseboards and the swing of the closet door if you're keeping it. A classic mistake is designing a beautiful bench that's just a half-inch too deep, preventing the door from ever closing again.
For a more comprehensive look at project planning, our guide on how to plan a home renovation has a fantastic checklist that can help.
Expert Tip: Once you have your measurements, grab some painter's tape. Mark out the footprint of your planned bench and the outlines of your cubbies directly onto the closet walls and floor. This simple trick lets you get a real-world feel for the layout before you start building.
Visualize Your Design Before Committing
Now for the fun part: playing with ideas without any risk. It can be incredibly difficult to imagine how that sleek, minimalist bench you saw online will actually look in your traditional entryway.
This is the perfect time to bring in an AI Interior Designer. You can just snap a quick photo of your empty closet, upload it, and start experimenting. In seconds, you can see your exact space transformed with a 'Modern Farmhouse' aesthetic, shiplap and all. Or, test-drive a 'Scandinavian' look with light woods and minimalist hardware. Seeing these variations in your own space lets you lock in your vision with total confidence, making sure the final result is something you'll absolutely love and avoiding costly mistakes.
Step 2: Bringing Your Vision to Life
Alright, you've got your plan, and the vision is clear. Now for the fun part: turning that underused closet into a genuinely useful mudroom. This is where your ideas start to become a reality. If you're new to DIY, don't worry—we'll break it down into simple, manageable steps.
Prep Work: Creating Your Blank Canvas
First things first, you need a clean slate. That means the old closet doors, the metal frame, and any hanging rods or shelves have to go. Take your time here; a careful demolition and proper prep job will save you headaches later on.
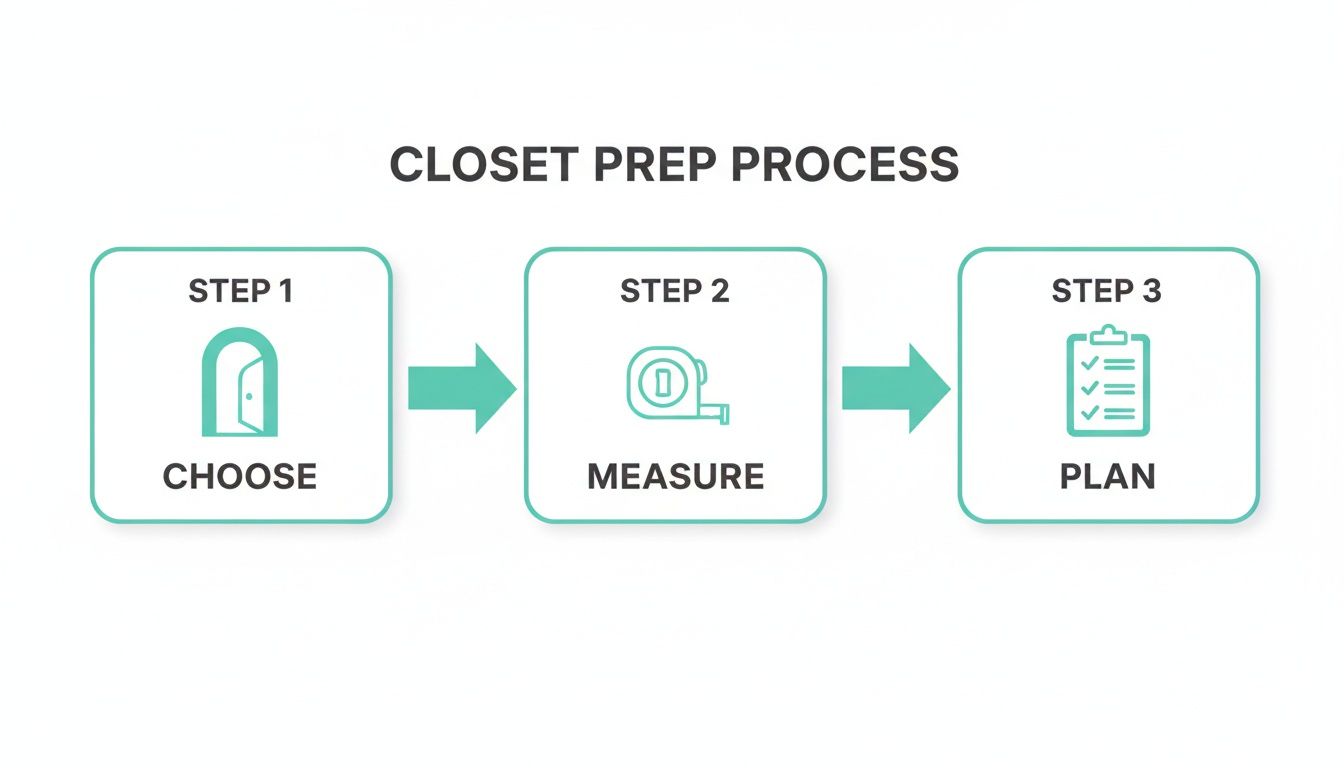
Once the closet is empty, you’ll probably be staring at a few screw holes and dings in the drywall. No big deal. Grab a small tub of spackle and a putty knife. Fill the holes, let it dry, give it a light sanding, and you’ve got a perfectly smooth surface ready for paint.
Building Out the Bones of Your Mudroom
With your closet prepped and freshly painted, it’s time to build the main event. A bench is almost always the star of the show—it’s the practical spot to sit down and wrestle with your boots. You could go for a simple, sleek floating bench or build a more traditional one with cubby storage underneath.
Next up, think about the back wall. This is a golden opportunity to inject some serious style into a small space.
- Beadboard or Shiplap: These panels are a classic for a reason. They add great texture and give the space a custom, built-in feel without a ton of complicated work.
- Bold Accent Paint: Want something simpler? Just painting the back wall a deep, contrasting color can create a dramatic focal point that makes the whole nook pop.
- Durable Wallpaper: A scrubbable, stylish wallpaper is another fantastic option. It adds pattern and protects the walls from the inevitable scuffs and dirt.
The key is to pick something that not only looks amazing but can also handle the daily chaos of a family drop zone. You need a finish that’s durable, cleanable, and still looks sharp.
Adding the All-Important Finishing Touches
Now we get to the details that make it all work. This is when you install the hooks for coats and backpacks, plus any shelves you've planned for baskets and other odds and ends. A pro tip I can't stress enough: secure your hooks directly into the wall studs. Use a stud finder to locate them. This is absolutely critical if you want those hooks to hold a heavy winter coat or a kid's overstuffed backpack without ripping out of the drywall.
Worried about the cost? This kind of project doesn't have to break the bank. You can turn a closet into a mudroom over a single weekend for just $302. When you compare that to a full-blown mudroom addition, which can easily run $12,000 or more, you're saving a massive 95%.
Before you start drilling, it’s a great idea to visualize how everything will fit together. You can take an interior design sketch or a photo of your empty closet and use an AI tool like Interior Flux Studio to play around with the layout. Testing different hook heights or shelf placements virtually can save you from patching unnecessary holes and ensures your final design is as functional as it is beautiful.
Step 3: Designing Smart Storage for Small Spaces
A truly great closet mudroom is all about wringing every last inch of utility out of the space with smart, efficient storage. This isn't just about throwing up a few hooks and calling it a day. It's about designing a personalized system that anticipates your family's needs and stops clutter dead in its tracks. The trick is to think vertically and get creative to make even a tiny closet feel organized and spacious.
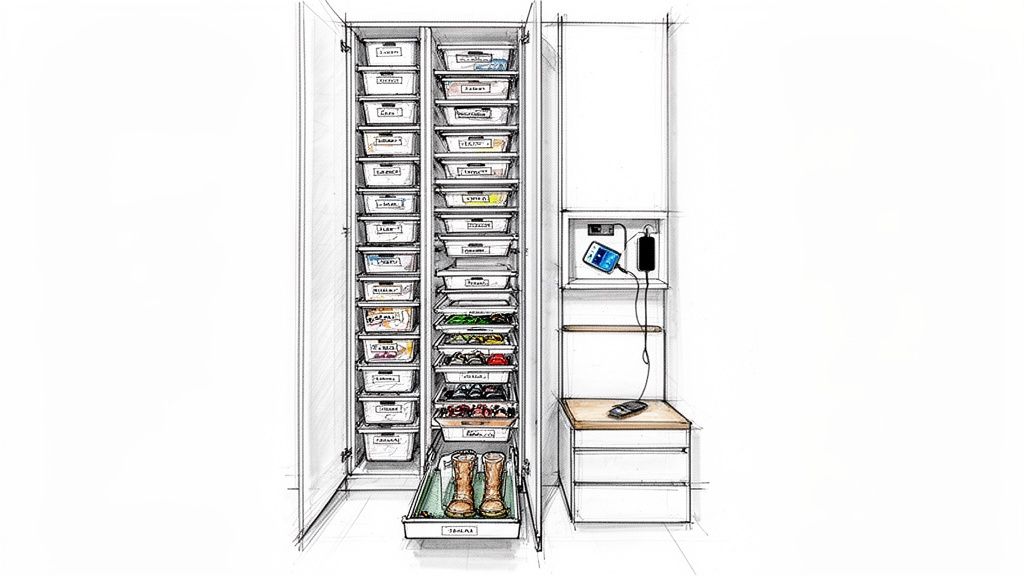
Go beyond a single row of hooks and embrace the power of vertical storage. Tall, slender cubbies are a game-changer for corralling backpacks, while a stack of bins up high can neatly store seasonal gear like winter hats, scarves, and gloves. You don't need a huge footprint to create a super-functional drop zone.
Smart Seating and Shoe Solutions
Every mudroom needs a spot to sit, but that seating doesn't have to swallow your entire floor plan. In fact, the right bench can actually double your storage capacity.
- Built-In Bench with Lift-Top Storage: This is the ultimate workhorse. It gives you a solid place to sit while hiding away bulky stuff like sports equipment, extra shoes, or pet supplies.
- Floating Bench: For a modern, minimal vibe, a floating bench is a fantastic choice. It keeps the floor totally clear, which not only makes cleaning easier but also creates the illusion of a bigger space—a classic trick for tight entryways. You can find similar space-saving concepts in our guide on studio and condo design ideas.
- Pull-Out Trays: Low-profile pull-out trays beneath a bench are perfect for containing muddy, wet, or sandy shoes and keeping them neatly out of sight.
It’s shocking how much you can fit into a small closet with the right design. I've seen a small 40″ by 40″ area—just over 11 square feet—outfitted with clever built-ins to hold a dozen coats, multiple bags, and at least eight pairs of shoes.
Personalizing Your Storage System
The best mudroom is one that’s built specifically for your life. Think about your daily frustrations and design solutions to solve them. For example, a small, hidden charging station tucked inside a cabinet can create a designated home for phones and tablets, freeing up your kitchen counters. When brainstorming, drawing inspiration from other creative, small-footprint projects like these small space bathroom remodel ideas can really get the ideas flowing.
Visualize Before You Build: Trying to guess how tall your cubbies should be or whether a floating bench will really work can be stressful. This is where digital planning can save you a huge headache. An AI tool like Interior Flux Studio AI is a great way to take the guesswork out of the process. Upload a photo of your closet and use its Canvas Editor to virtually drop in different storage elements. Test out bench styles, play with shelf heights, and see exactly how it all comes together before you ever pick up a hammer. It ensures the final design is perfectly suited to both your space and your family's needs.
Step 4: Adding Style and Renter-Friendly Ideas
Now that the heavy lifting is done and the structure is solid, you get to move on to the best part: making it look great. This is where you infuse your own personality into the space, turning it from a simple utility zone into a genuinely welcoming part of your home. The right flooring and lighting are about more than just function; they set the entire mood.
Let's be honest, mudroom flooring needs to be tough. It’s your home's first defense against whatever you're tracking in. That’s why Luxury Vinyl Tile (LVT) is such a brilliant option. Not only is it 100% waterproof and built to last, but it also comes in a huge range of styles, from convincing wood planks to modern geometric patterns. Plus, it’s one of the most DIY-friendly flooring materials out there.
Good lighting is just as critical. A single, well-chosen flush-mount light or a chic wall sconce can instantly brighten the space and give it a more polished feel. For a truly custom vibe, try tucking some LED strip lighting under the bench or behind shelves. It casts a soft, professional-looking glow that feels both high-end and inviting.
Smart Solutions for Renters
Think this project is impossible because you're renting? Think again. You can absolutely create a fantastic, functional mudroom without making any permanent changes that would upset your landlord. The trick is to lean into freestanding furniture and clever, damage-free products.
Here are a few of my go-to ideas for a non-permanent mudroom:
- Freestanding Benches: Skip the built-in and find a sturdy, narrow bench that fits your nook. Look for one with a built-in shelf or cubbies underneath—it’s a game-changer for shoe storage.
- High-Strength Adhesive Hooks: Modern removable hooks are shockingly strong. Brands like Command make a variety of styles that can easily handle heavy winter coats and backpacks, and they peel right off when you move out.
- Peel-and-Stick Finishes: Love the look of shiplap or a fun wallpaper? Peel-and-stick versions are a renter’s dream. They're a breeze to apply and come off without a trace. You can even find peel-and-stick floor tiles to temporarily cover up less-than-ideal flooring.
For renters, the strategy is all about layering. You want to create a space that feels intentional and built-in, but everything can be easily packed up and taken with you. It's temporary architecture—all the function and style, with zero commitment.
Visualize Your Final Look
It can be tough to commit to a paint color or decor style when you’re just staring at a blank space. This is where an AI tool like Interior Flux Studio can be incredibly helpful. Just upload a photo of your closet, and you can instantly see what it would look like with a 'Coastal' theme using light woods and blue tones versus an 'Industrial' vibe with dark metal hooks. It's a fantastic way to experiment with different looks and feel confident in your choices before spending a dime. To get your creative juices flowing, you can check out popular looks in our complete interior design styles guide.
Answering Your Top Closet Mudroom Questions
Even the most well-thought-out DIY project comes with its own set of questions. It's totally normal. To make sure you feel ready to tackle this conversion, I've rounded up the answers to the questions I hear the most from homeowners just like you.
What’s this project really going to cost me?
This is where this project truly shines—it's incredibly adaptable to your budget.
For a simple, effective DIY conversion, you could spend as little as $200 to $500. This would cover essentials like a fresh coat of durable paint, a set of quality wall hooks, and a simple, sturdy bench. It’s amazing what a big impact those few items can make.
If you're dreaming a bit bigger with custom built-in cubbies, having new lighting professionally installed, and upgrading the flooring, your budget might be closer to the $1,000 to $3,000 range. When you compare that to a full-blown mudroom addition—which can easily run you $10,000 or more—it’s an incredibly smart investment.
What's the best flooring for a closet turned mudroom?
When it comes to flooring for a space that’s going to see a lot of foot traffic, dirt, and moisture, you need something that can take a beating. Durability and water resistance are non-negotiable.
Luxury Vinyl Tile (LVT) is the top contender. It’s tough as nails, completely waterproof, and a breeze to clean. Muddy paws and dripping raincoats are no match for it.
Looking for other solid options, especially if you're on a tighter budget or renting?
- Durable Floor Paint: Don't underestimate the power of good paint! A couple of coats of high-quality porch or floor paint, finished with a protective sealant, creates a surprisingly resilient and stylish surface.
- Interlocking Rubber Tiles: These are super practical and almost foolproof to install. They’re great for trapping dirt and moisture right at the door.
Can I do this if I'm renting?
You absolutely can! The trick is to think in terms of non-permanent additions that won't leave a trace. Your landlord will thank you.
Instead of a built-in unit, find a stylish freestanding bench that fits the space. For hanging coats and bags, look for high-quality removable adhesive hooks—the kind designed to hold some real weight. You can still bring in plenty of personality with renter-friendly decor like peel-and-stick wallpaper or floor tiles. They offer a huge visual impact but come off cleanly when it's time to move.
When should I call in a professional?
Most of this project is well within the reach of a determined DIYer. However, there's one area where you should never, ever cut corners: electrical work.
If you're planning to add a new outlet for a charging station or want to install hardwired lighting like a pendant or a sconce, you must hire a licensed electrician. It's not just about getting it done right; it's about safety and making sure everything is up to code. It's the one part of the job that’s always worth the extra cost. While AI can help you visualize where to place lights, it can't handle the wiring. For that, trust a pro.
Feeling inspired but need a little help picturing the final result? Instantly reimagine your closet from a photo. Try Interior Flux Studio AI to explore dozens of design styles and layout ideas for your new mudroom, all without lifting a hammer. Turn your vision into a concrete plan today.