Before you buy a single pillow or pick up a paintbrush, the most powerful tool you have is a simple pencil and paper. The humble interior design sketch is your secret weapon for turning a fuzzy idea into a clear plan. It’s not about creating a masterpiece; it’s about pulling the vision out of your head and onto a page to avoid expensive mistakes and decision fatigue later.
This simple step is what separates a dream space from a well-designed reality, whether you're a homeowner planning a renovation, an Airbnb host optimizing a rental, or a real estate agent staging a property.
Why a Simple Sketch Is Your Project's Best Friend
Think of an interior design sketch as a roadmap. It brings clarity to the chaos of a redesign, forcing you to think about practical things like scale, flow, and how you’ll actually live in the space.
This is how you avoid common pitfalls, like ordering a beautiful sofa that eats your entire living room or realizing your new dining table blocks the only closet. For an Airbnb host, a quick sketch is key to maximizing a small space for both comfort and visual appeal, leading directly to better listing photos and more bookings. For homeowners, it saves money and stress by solving problems on paper first.
Lock In Your Vision and Avoid Common Problems
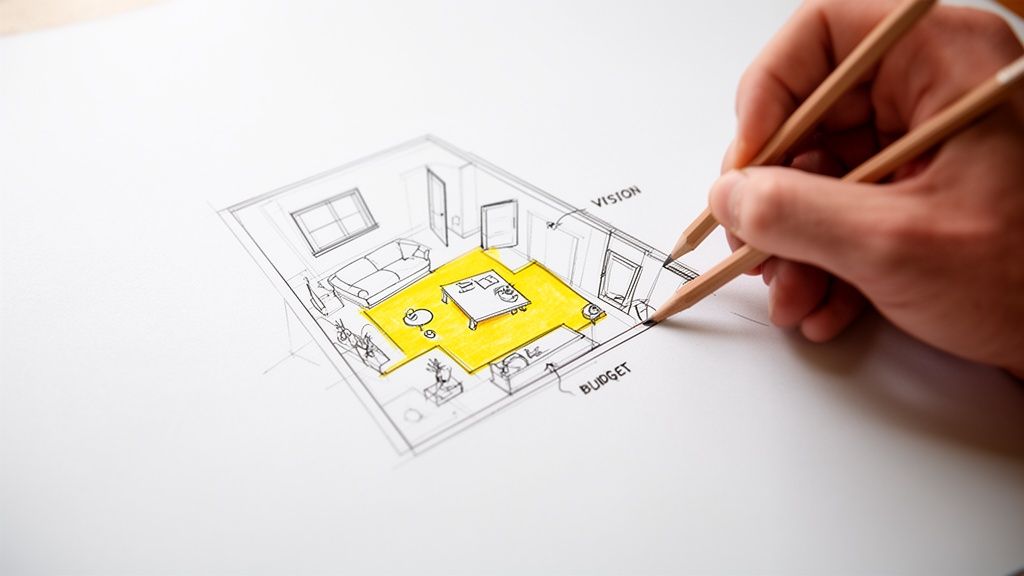
The biggest benefit of sketching? Clarity. It makes abstract ideas concrete. When you're trying to decide where furniture should go, a few quick drawings are worth a thousand words. It’s why pros always sketch a basic layout before doing anything else.
A simple sketch helps you:
- Test layouts in minutes. Wondering if a big sectional works better than two armchairs? Draw both versions. No heavy lifting required.
- Catch deal-breakers early. You’ll quickly see if a door can't open fully or if your planned TV spot gets blinding afternoon sun.
- Communicate your ideas clearly. A sketch is a universal language. It shows your partner, contractor, or designer exactly what you're thinking, reducing misunderstandings that cost time and money.
Connect Your Hand-Drawn Ideas to AI Magic
Today, your simple sketch is the perfect starting point for AI interior design tools. Instead of trying to describe your layout with words, you can just upload your drawing. An AI tool like Interior Redesign AI can then generate photorealistic design concepts in seconds.
A sketch is the most direct way to communicate your vision for a space. It’s not about perfect lines; it’s about translating function and feeling onto paper, giving both you and technology a clear blueprint to work from.
This blends the personal touch of a hand-drawn plan with the incredible speed and power of AI. It’s a low-stress way to explore dozens of different aesthetics—from the calm, clean lines of Japandi (a hybrid of Japanese and Scandinavian style) to a raw, Industrial vibe—before committing to any purchases.
This is perfect for visualizing how different materials, like warm oak floors or a dramatic marble countertop, will truly look and feel in your home. You can even get inspired by browsing interior design mood board examples to define your style before you start drawing.
How to Create a Practical Hand-Drawn Sketch
Let’s be clear: you don’t need to be an artist. The goal here is clarity, not a gallery-worthy masterpiece. A simple, clean drawing is your best tool for planning a space and is the perfect input for bringing your vision to life with AI.
Step 1: Start with the Basics—Your Floor Plan
First, grab a tape measure, a pencil, and some paper (graph paper is great but not required). Measure the length and width of your room and draw its basic shape from a top-down, bird's-eye view. This is your floor plan.
This simple outline is the foundation for everything. Getting the dimensions right is crucial because all your furniture, rugs, and walkways depend on it.
Next, add the permanent fixtures you can't move:
- Doors and Windows: Mark their locations and, importantly, which way each door swings. This small detail prevents you from placing a bookshelf where a door needs to open.
- Architectural Features: Sketch in fireplaces, built-in shelves, radiators, or structural columns.
- Outlets and Switches: Note every electrical outlet, light switch, and light fixture. There’s nothing worse than designing the perfect reading nook only to realize there’s nowhere to plug in a lamp.
Step 2: Add Furniture and Define Zones
Now for the fun part: placing furniture. A great trick is to cut out little paper shapes to scale for your sofa, chairs, and tables. This lets you shuffle things around without constantly erasing.
This is where you solve real-world design puzzles.
- Living Room: Is your goal a cozy conversation area or the perfect setup for movie nights? A sketch helps you decide.
- Bedroom: Can you realistically fit a queen bed and a small desk for working from home in your apartment? Draw it to see.
- Kitchen: Sketching your "work triangle"—the path between the stove, sink, and fridge—ensures your layout is efficient and easy to use.
- Bathroom: A quick drawing can confirm if you have enough clearance for the vanity door to open without hitting the toilet.
Pro Tip: Always leave room to walk! A common mistake is cramming a room with furniture and forgetting about "negative space"—the empty areas that make a room feel open and usable. Aim for at least 30-36 inches for your main pathways.
This is also a great time to think about materials. Scribble notes directly on your sketch, like "herringbone tile here" or "large format concrete tile," especially when exploring custom tiles design ideas for a kitchen or bathroom.
Finally, write your desired style—like "Japandi" or "Coastal"—in the corner as a reminder. If you're still deciding, our complete guide to interior design styles can help you find your match. With your simple sketch complete, you have a powerful blueprint ready for AI.
How to Prepare Your Sketch for AI Visualization
This is where your simple drawing becomes a launchpad for incredible design ideas. To get the best results from an AI design tool, you need to provide a sketch that’s clean, clear, and easy for the software to read. Think of it as giving the AI a perfect map of your vision.
Don't worry, the goal isn't artistic perfection; it's clear communication. A few small tweaks to your drawing can make a huge difference in the quality of the designs you get back.
From Paper to Pixel: How to Digitize Your Sketch
The way you capture your sketch is just as important as the drawing itself. A blurry, angled photo will only confuse the AI, leading to warped results. You want a crisp, clean digital version.
Here’s how to do it right:
- Find Good, Even Light: Snap the photo in a bright space, ideally with natural daylight near a window. Harsh shadows can look like lines or objects to the AI.
- Shoot Straight Down: Hold your phone directly over the sketch, parallel to the paper. Shooting from an angle will distort the room's proportions in the final render.
- Use a Simple Background: Place your drawing on a plain, uncluttered surface like a white desk. This helps the AI focus only on your sketch.
Fine-Tuning Your Drawing for the Best Results
Once you've got the photo technique down, a few tweaks to the drawing itself will boost its effectiveness. Bold, confident lines are much easier for an AI to process than faint pencil marks. I recommend going over your final lines with a fine-tip black marker for high contrast.
The best sketches for AI are the clearest, not the most detailed. Simple shapes and bold lines give the AI direct instructions, which leads to designs that are much closer to what you imagined.
Your notes, or annotations, are direct commands for the AI. Instead of trying to sketch a perfect wood grain, just draw an arrow to the floor and write “white oak flooring.” Want a cozy, minimalist vibe? Jot down “Japandi style” in a corner. These text cues are essential for making AI for room design a powerful and collaborative partner.
Quick Guide to AI-Ready Sketches
Follow these simple tips to ensure your sketch is optimized for the best results when using an AI interior design tool.
| Do This | Don't Do This | Why It Matters for Real Spaces |
|---|---|---|
| Use bold, clean lines (like with a marker) | Use faint, sketchy pencil lines | High-contrast lines are easier for the AI to detect, ensuring an accurate layout. |
| Add text labels for materials & styles | Draw complex textures or patterns | Text is a direct command, removing guesswork about what you want to see. |
| Keep the layout simple and 2D | Add 3D perspective or shading | A flat, top-down view prevents distortion and layout errors in the final design. |
| Photograph directly overhead in good light | Take angled photos with shadows or glare | A straight, well-lit image ensures the AI sees the correct room proportions. |
| Erase stray marks and smudges | Leave messy lines or background clutter | A clean image prevents the AI from mistaking random marks for walls or furniture. |
By following these guidelines, you're speaking the AI's language, which saves you time and leads to much more satisfying results.
The visual guide below breaks down the simple workflow for creating a solid sketch from scratch.
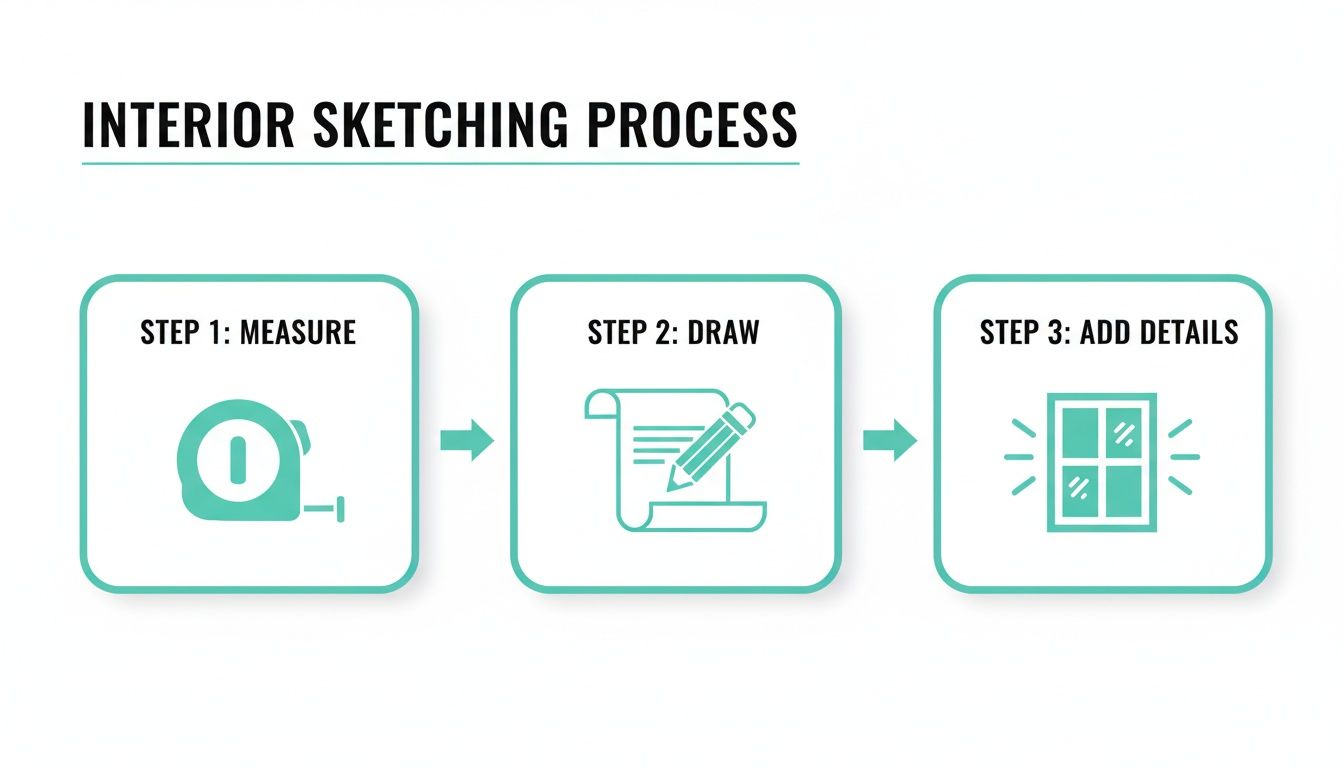
This process—measure first, draw the structure, then add key details—creates a sketch that is accurate and perfectly ready to be transformed into a stunning digital concept by an AI.
Bringing Your Sketch to Life with AI
This is where the real fun begins. Your simple, hand-drawn sketch is about to become an incredibly powerful tool for exploring designs without any risk. Once you have a clean sketch, you can upload it to an AI platform and get photorealistic designs in seconds, closing the gap between a pencil line and a fully realized room.
With a tool like Interior Redesign AI, the process is straightforward. Just upload a clear photo of your sketch, and from there, you can cycle through dozens of different design styles with a single click.
Experiment with Zero Commitment
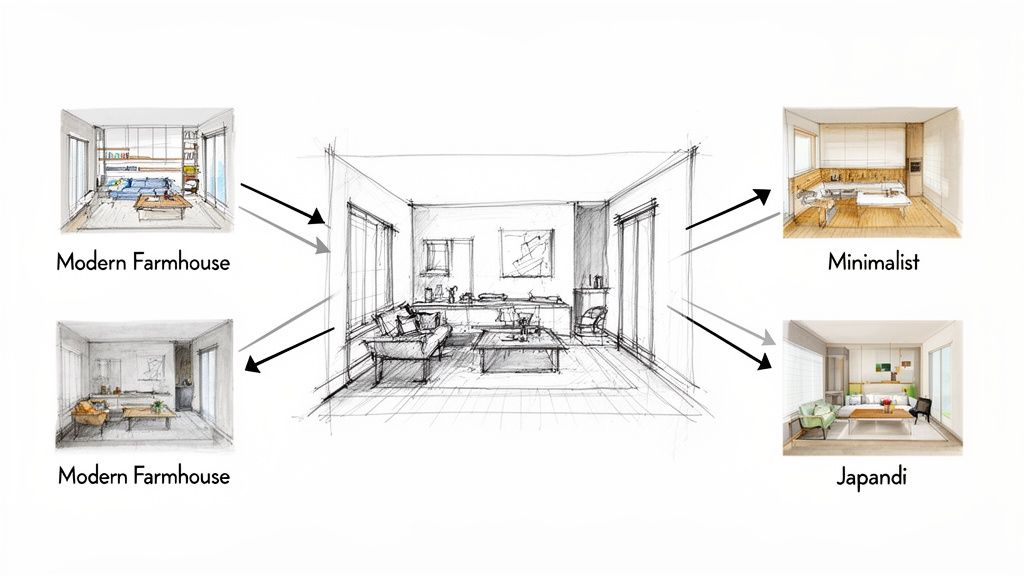
Ever been torn between two completely different looks? Maybe you're debating a cozy Modern Farmhouse aesthetic versus a sleek, Minimalist vibe for your living room. Instead of spending hours on Pinterest, you can apply both styles to your sketch and see the results instantly. This lets you compare concepts side-by-side, making it so much easier to choose a direction with confidence.
This rapid visualization is a huge help for anyone feeling overwhelmed by options. In minutes, you can test:
- Dozens of color palettes without buying a single sample pot of paint.
- A huge variety of material finishes, like seeing if that marble countertop really works better than butcher block in your kitchen.
- Completely different furniture styles to see how a mid-century modern sofa stacks up against a classic chesterfield in your actual room layout.
Real-World Benefits for Your Project
For homeowners, this means visualizing big-ticket choices before you spend money. Seeing how that pricey velvet sofa will actually look in your home is a massive relief and prevents costly returns. For real estate agents and Airbnb hosts, it’s like having virtual staging on demand. You can take a sketch of an empty floor plan and generate beautiful, furnished concepts that boost a listing's appeal and help buyers or guests see a property's true potential.
This workflow saves an incredible amount of time and reduces decision-making stress. It gives you the confidence to make bold design choices because you’ve already seen a realistic preview of how it will turn out.
While AI is a powerful tool, it works best when guided by your vision. It might generate an idea you hadn't considered, but you can always refine it. Combine the best AI-generated concepts with your own taste, or use them as a starting point to collaborate with a professional designer. You can learn more about how technology has evolved by exploring the best interior design rendering software.
The beauty of using AI is that it doesn’t replace your creativity—it amplifies it. Your sketch provides the layout and core idea. The AI then acts as a super-fast assistant, rendering that idea in countless variations until you find the perfect one.
Common Sketching Mistakes and How to Avoid Them
Even a simple sketch can lead you astray if you're not careful. Your sketch is the blueprint for your project, so getting it right from the start will save you major headaches. Luckily, the most common mistakes are easy to avoid.
Mistake #1: Guessing Measurements
One of the biggest issues is improper scale. It’s easy to draw a sofa that looks great on paper, only to have it block a walkway or overwhelm the room once it's delivered. This almost always happens from "eyeballing" it instead of using real measurements.
The Fix: Measure everything twice before you draw. Use graph paper to keep your scale consistent (e.g., one square equals one foot). This simple step makes a world of difference for creating a realistic plan.
Mistake #2: Forgetting the "Boring" Stuff
Another common mistake is getting so excited about placing furniture that you forget about permanent fixtures. That awkward radiator, the light switches, and electrical outlets are often overlooked. There's nothing worse than designing a perfect entertainment center only to realize the nearest outlet is on the opposite wall.
The Fix: Before drawing any furniture, do a thorough walk-through. Mark every outlet, switch, vent, and unmovable feature on your floor plan first. This ensures your design is not just beautiful but actually functional.
Mistake #3: Not Leaving Room to Breathe
A cluttered sketch leads to a cluttered room. It's tempting to fill every corner, but this ignores a crucial design element: negative space. This is the empty space around objects, and it’s what makes a room feel open, calm, and easy to navigate.
When you plan for negative space, you’re designing for comfort and flow. It's the visual pause that makes your key furniture pieces stand out and keeps the room from feeling cramped.
The Fix: Make sure your sketch includes clear pathways for traffic. A good rule of thumb is to leave at least 30 inches for major walkways. As you arrange furniture, pull pieces away from the walls to give them a little breathing room. This creates a much more inviting and functional layout. A well-planned sketch also helps you choose finishes, which you can learn more about in our guide on how to choose paint colors for rooms.
Your Questions About Interior Design Sketching Answered
Starting a new design project always brings up a few questions. Here are answers to some of the most common ones about creating and using sketches.
Do I Need Expensive Software to Make a Digital Sketch?
Absolutely not. While professionals use complex programs, you can get fantastic results with just a pencil and paper. A clean, well-lit photo of your hand-drawn sketch is all you need to use a tool like Interior Redesign AI. The AI handles the rendering, transforming your simple lines into a realistic concept. Your job is to focus on getting the layout right, not learning software.
How Detailed Should My Sketch Be for an AI Tool?
Less is more. Your goal is to give the AI clear, simple information. Forget shading or tiny details; focus on the "bones" of the space.
The AI needs to know:
- The Room's Shape: A clean outline of the walls.
- Key Features: Where doors, windows, and fireplaces are.
- Furniture Layout: Simple boxes or circles are perfect for showing where you want the sofa, bed, or table.
Instead of trying to draw a floral pattern on a chair, just write "blue velvet sofa" or "jute area rug" on your sketch. These text annotations give the AI precise instructions and lead to cleaner, more accurate results.
Can I Use a Sketch to Plan My Patio or Balcony?
Yes, sketching is brilliant for outdoor spaces! The same rules apply. Start by measuring your patio, deck, or balcony, noting any railings, columns, or doors. Once you have the footprint, you can play with layouts for furniture, planters, or an outdoor rug. It's a practical way to maximize a tiny apartment balcony or create separate dining and lounging "zones" on a larger terrace.
What if My Hand-Drawn Sketch Looks Terrible?
Don't let a lack of artistic skill stop you. An AI tool isn't an art critic; it's a data processor. As long as your lines are relatively straight and your proportions are correct, the tool will understand your intent.
A simple trick is to use a ruler for walls and windows, then go over your final lines with a black marker. This creates a bold, high-contrast image that’s easy for the AI to read. Even the most basic sketch can become a stunning design.
If you have more questions, you can find more information on our frequently asked questions page.
Ready to see your simple sketch become something real? With Interior Redesign AI, you can upload a drawing and instantly reimagine your room in over 50 different styles. Stop guessing and start visualizing. Try it now and bring your design ideas to life in seconds.